
 English
 français
 Deutsch
 русский
 italiano
 español
 português
 Nederlands
 العربية
 Türkçe
 Polski

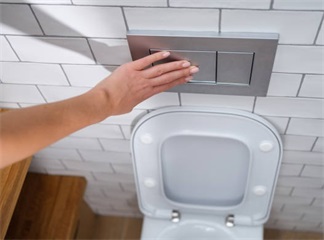
Replacing a faulty flushing system is not difficult. Start with the tools you need to fix your push-button toilet flush: a pair of handles; a flathead screwdriver.
Step 1. Turn off the water supply. If your toilet has an isolation valve, you can shut off the water without stopping the water supply to the rest of your home. If you don't have such a valve next to your toilet, then you'll need to shut off the water at the faucet under the kitchen sink.
Step 2. Open the cistern. Carefully remove the cistern cap and disconnect the filler tube. Put the cover in a safe place and remove the old button.
Step 3. Drain the water. Empty the water in the cistern. This allows you to remove the entire cistern.
Step 4. Remove the cistern. No toilet button replacement task is complete without removing the cistern first. Remove the pipe that supplies water to the cistern. Then, empty the remaining water in the cistern and close the toilet lid. Step 5: Remove the old flushometer.
Step 6. Install a new flushing unit. Take the new mechanism out of the packaging. Remove the ring washer and loosen the nut by hand. Move the new seal up so that it fits snugly against the bottom of the unit. Then pop the valve through the cistern and secure it in place. Put back the metal clip and tighten the nut with. Put back the old or new gasket, depending on whether the old gasket is still reusable.
Step 7. Put the cistern back on. Put the two bolts back into the slots in the bottom of the cistern and carefully set them in place. Tighten the nuts to secure the cistern to the toilet. Grab your screwdriver and tighten the screws that secure the cistern to the wall. Check that everything looks good and stable.
STEP 8. Check and adjust the flush valve. Make sure the water inlet valve is set properly. This allows the float to move up and down unimpeded. Double-check the instructions that came with your unit for any water-saving float adjustments. After connecting the toilet to the water system again, you can test the results.
Step 9: Replace the flush button. Unscrew the nut on the back, install the button and tighten the nut.
Step 10. Turn on the water supply. Connect the toilet to the water system. Flush the toilet a few times to test that everything is working.
Welcome to visit Oceanwell website for more product details.


 No. 33 Shishan North Road, Dongfu Street, Dongfu Town, Haicang Dist., Xiamen,Fujian, China
 +86 13605038522
 +86-592-5685085 ext.8010
 sales08@oceanwellxm.com
 +86 13605038522
 IPv6 network supported